My Tiny Bathroom Has No Storage—Here's How I Organized All My Beauty Products
Welcome to Month of Me, where every day in January, we’ll be publishing a new fashion, beauty, or wellness article featuring a first-person account of shaking up an old habit, pushing beyond a comfort zone, or simply trying something new. Follow along for 31 days of storytelling, including what it’s like to quit alcohol for 80 days, try Beyoncé's very strict diet, or completely overhaul your closet.

Photo:
@gisellechildsName: Giselle Childs, copy editor, Who What Wear
What did you try?
DIY adhesive bathroom storage
Why did you try it?
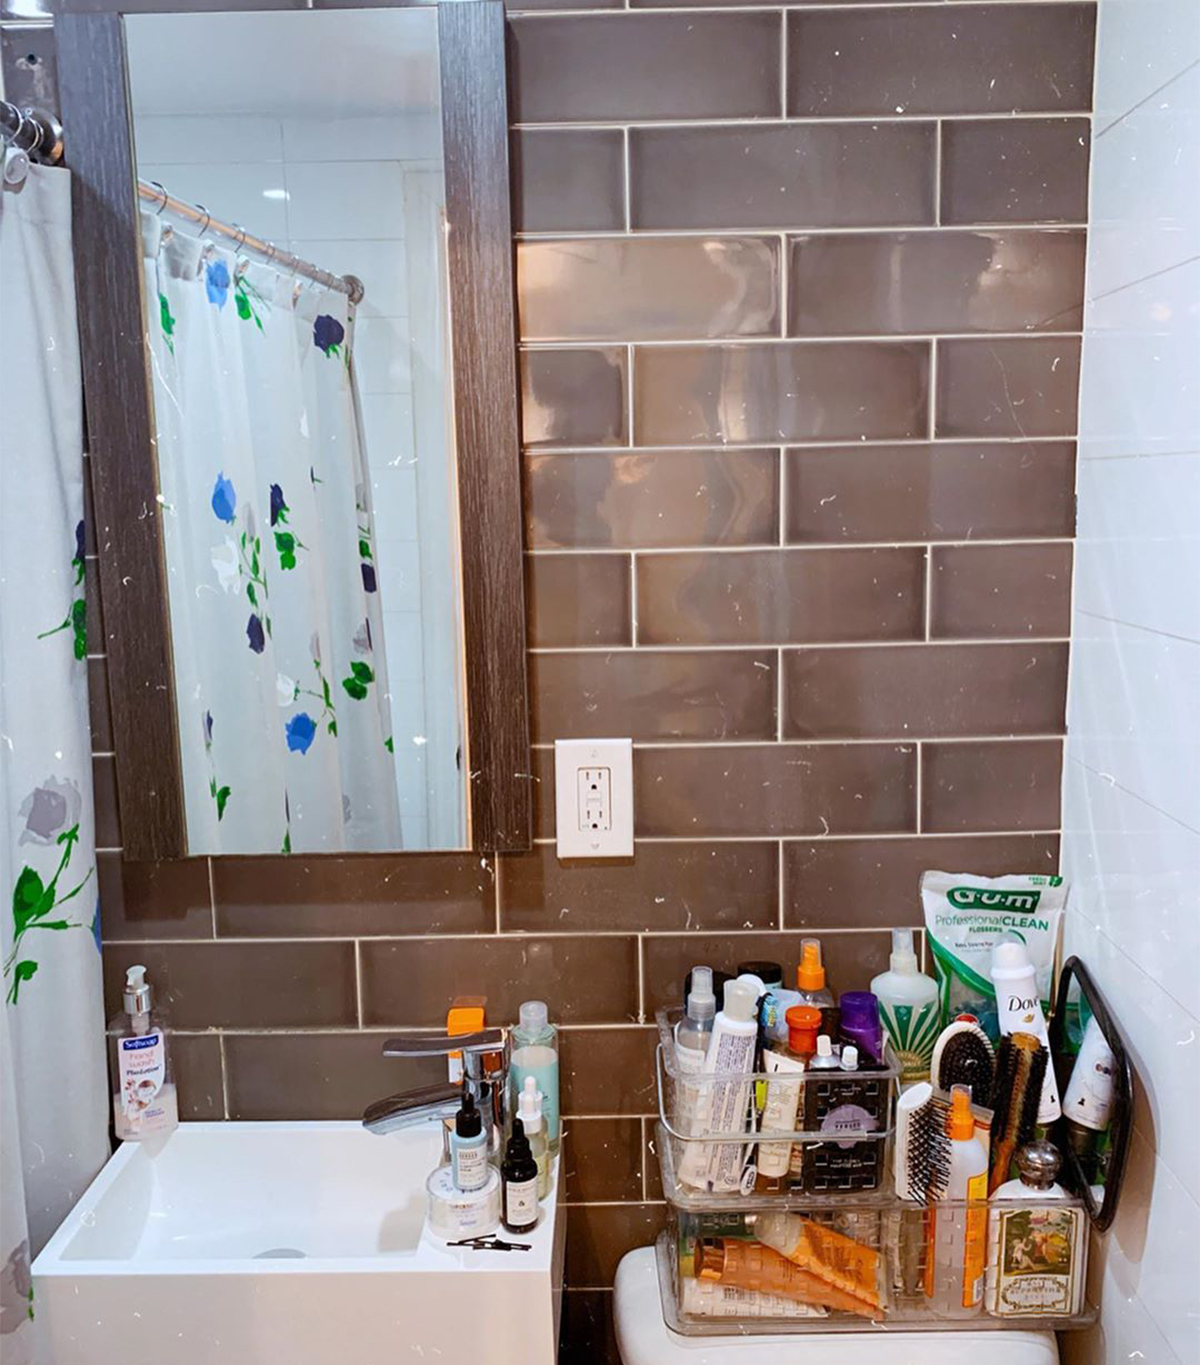
I was inspired by the DIY storage I saw in Rio Viera-Newton’s bathroom via a photo she posted on Instagram. She’s a beauty writer at The Strategist and always has great skincare recommendations, so I trust her. She used clear acrylic containers with adhesive backing to increase the storage options for her skincare and makeup in her small bathroom. As someone with an insanely small and unhelpful bathroom—no shelves, no counter space, no medicine cabinet—I was intrigued and figured this was a DIY I could actually do since it didn’t involve anything crazy like drilling into my tiled walls. I have so many moisturizers and serums cluttering up the shower caddies I’ve placed on top of my toilet for storage (not chic!) that I wanted a more organized way of displaying them that was handy as well.
How did you prepare?
I stalked the comments on her post to try to find out the exact acrylic containers she used. I wasn’t successful, but the containers I ended up finding were close enough. Then I pretty much just placed an Amazon Prime order for adhesive acrylic containers, did some mental spacing once they arrived, and stuck them to the wall.
What happened during the whole process?
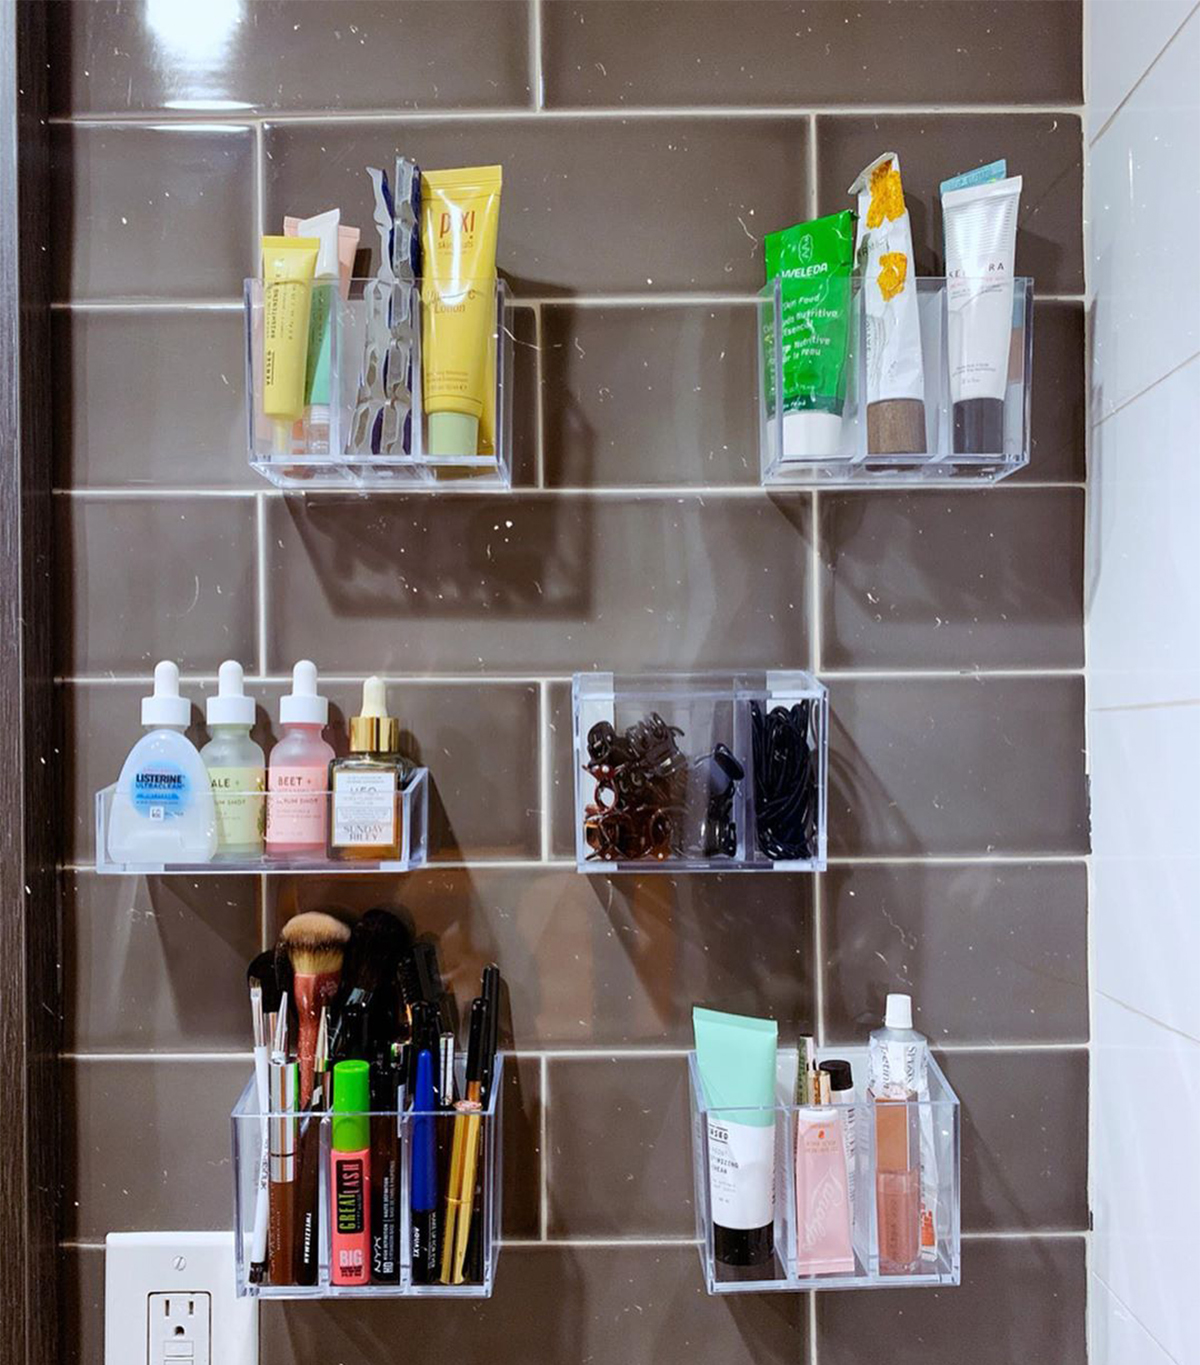
Honestly, it was kind of a mess, but that’s on me. I unboxed all the acrylic containers. I had ordered eight—some came in multi-packs—and ended up with six I could use. (Two were clearly too big and have been languishing on the floor next to my couch for months still waiting for an assignment.) I gave a half-hearted attempt to lay them out on the floor to plan where they’d go on the wall but ultimately just started peeling off the adhesive and sticking things to the tile. Eventually, I ended up with three rows of neat-ish acrylic containers haphazardly stuck over my toilet (now I’m realizing that’s kind of gross?) ready to be filled with cotton swabs and serums and all my hopes and dreams.
Any challenges?
After struggling a bit with placement, my biggest challenge was deciding what to put in the containers. I had to push back against the irrational need to have products in each container match or be from the same brand. (Instagram, GTFO of my head!) I tried to group items in similar categories or put those I use the most like my retinol or moisturizer and hair elastics within the easiest reach. I moved stuff around for days.
How did you feel afterward? What kind of changes did you notice?
Immediately after I finished the DIY and took a million pictures, I was self-satisfied and content, maybe even a little smug. All that changed, obviously, over the next few mornings as I heard crashes in my bathroom post–shower routine. My neighbors heard a lot of morning cursing those few days… Actually, they hear that every day. I am not a morning person… but I digress.
What did you like?
I liked feeling more organized, and I enjoyed the extra pizzazz that having products displayed nicely on the wall gave my bathroom. I liked feeling like I’d accomplished something.
What did you hate?
I hated that the containers fell down! Plus, I actually ended up bringing more products into the bathroom to put on the little shelves and ledges, so it didn’t even ultimately cut down on the clutter. All the products that were in the bathroom already (haircare, body lotion, etc.) were too big and heavy to fit the shelves I got, so they remained clustered on the ledge in my shower and on top of my toilet.
Would you try it again?
I would not try it again since the all-tile walls of my apartment don’t seem conducive to that type of product. Plus, I’m moving! So peace out to that bathroom. Good riddance…
Any advice for anyone who's thinking about trying it?
If you have an all-tile bathroom like I do, this is not for you. However, if, like Rio, your walls are drywall, I’m guessing you’ll have better luck with this project.
Any surprises?
Unfortunately, the biggest surprise was when the containers started to jump ship and careen off the wall. You see, another issue with my bathroom is a lack of ventilation. When the shower is on, the room gets very hot and the walls get very wet. (I can’t with the contractors in this building…) To be honest, I did worry about this from the start. I thought it was possible that the steam from the shower would loosen the adhesive and destabilize the containers, and sadly I was right. With each new shower I took, a container would come tumbling down from its perch and let loose a torrent of whatever it was holding all over my bathroom. Thank goodness I always keep my toilet closed or else I could have lost all my favorite eyeliners down that pesky porcelain bowl.
- Explore More:
- Month of Me
- beauty
- Makeup
- Skincare


